Jimdo Website Builder Tutorial (2026) – How to Build a Free Website with Jimdo
Want to build a professional website without any coding skills? Jimdo is one of the easiest website builders out there, and in this tutorial you'll learn exactly how to go from zero to a fully published website — step by step.
We're building a website for a fictional cafe called Julian's Cafe, but the same process works for any kind of business, portfolio, or personal project. Follow along and you'll have your own site live by the end.
1. What is Jimdo?
Jimdo is a website builder based in Hamburg, Germany. It lets you create a complete website without writing a single line of code.
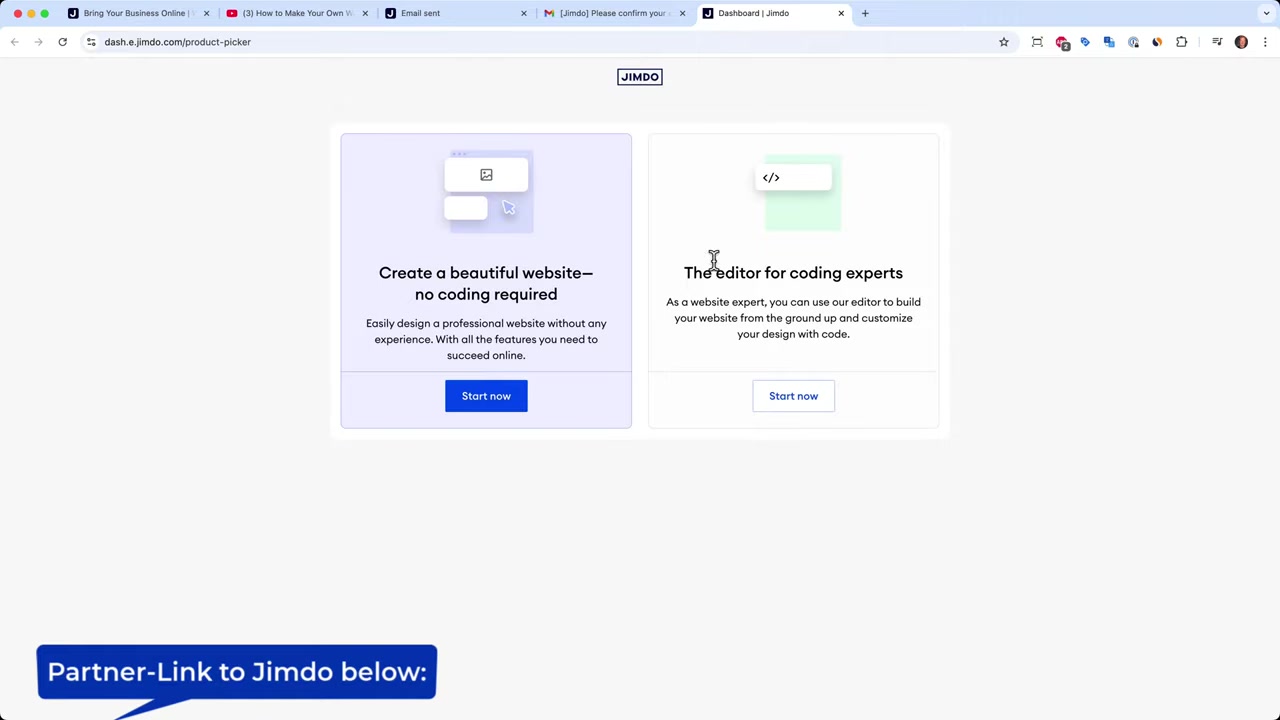
It offers two modes: a beginner-friendly Website Builder and an Expert Editor for those comfortable with HTML and CSS. For most people, the Website Builder is the right choice — it guides you through the entire setup process automatically.
Jimdo also handles domain registration, so you don't need a separate domain provider to get your site online.
2. Sign Up for Free with Jimdo
Head to Jimdo using the partner link in this post and create your free account. You can sign up with Google, Facebook, or your Apple ID.
After signing up, Jimdo sends you a confirmation email. Click Confirm and you'll land directly in your dashboard.
From the dashboard, choose Website Builder (no coding required) and click Start Now. Jimdo will then walk you through a short setup wizard to tailor your site.
3. Answer the Setup Questions
Jimdo asks a series of short questions to understand what kind of website you need. Here's a quick overview of what you'll fill in:
- Purpose — personal project, hobby, or business
- Name — e.g. Julian's Cafe
- Business category — e.g. Cafe
- Goals — promote a business, get bookings, receive messages
- Topic — Jimdo offers preset topics like Cafe & Bakery
- Style — Modern, Minimal, or Fresh
- Colors — choose a starting palette (you can change it later)
- Pages — select which pages you want (e.g. Contact, Menu)
Once you've answered all the questions, Jimdo generates a complete website for you. If you don't like the result, just go back and start the wizard again — it only takes a minute.
4. Set the Global Design Settings in Jimdo
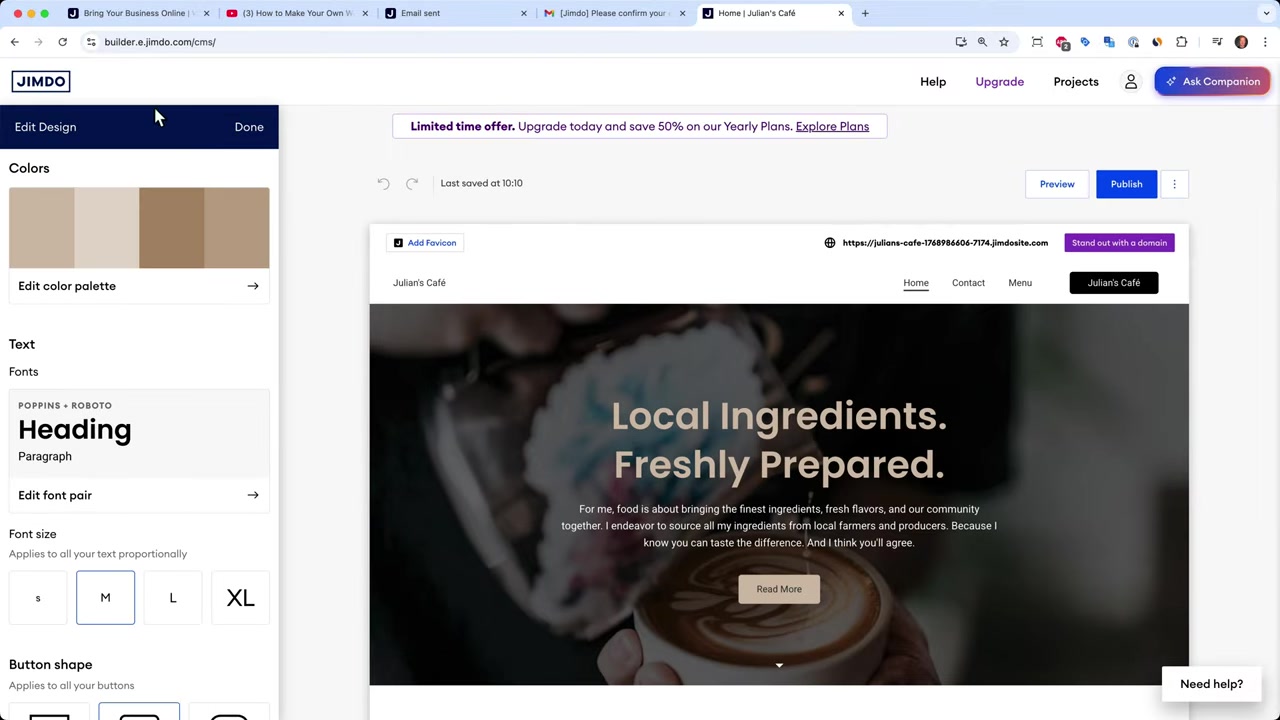
Before editing any content, head to the Design section. This is where you set colors, fonts, and button shapes — and these settings apply site-wide automatically.
This saves a huge amount of time. You won't have to manually adjust the color of every headline or button later.
You can choose from ready-made color templates, generate a palette from a photo (e.g. a coffee image), or upload your own brand colors. There's even an AI option that suggests palettes for you.
For fonts, pick something clean and readable. Jimdo also lets you adjust font size — useful if your audience tends to be older. For button shapes, the rounded style works well for most websites.
5. Edit Your Homepage Content
Now it's time to make the site your own. Click on any text element to edit it directly — for example, change the hero headline to Welcome to Julian's Cafe.
You can adjust text style (heading size, bold, italic), link text to other pages, and edit buttons. For example, rename a button to Contact Us and link it to your contact page.
To change the background image, click on it and choose from Jimdo's built-in stock photos (search by keyword like cafe), import from Facebook or Google, or upload directly from your device.
Each section also has layout options — click the design icon to browse different arrangements for your hero text, buttons, and image. Pick the one that best fits your content.
6. Upload Your Images
You can upload images to any section simply by clicking on the image area. Jimdo gives you three options: browse stock photos, import from social accounts, or upload from your device.
If you don't have professional photos yet, Jimdo's stock library covers most common topics. Just search for your category and pick what fits.
7. Change Section Layouts and Move Sections
Every section in Jimdo has a design panel with multiple layout options. Click the design icon on any section to swap between different visual arrangements without touching the content.
Need to reorder your sections? Click the three-dot menu on any section and choose Move Up or Move Down. You can also duplicate a section if you want a similar layout further down the page.
8. Add a New Block to Your Jimdo Website
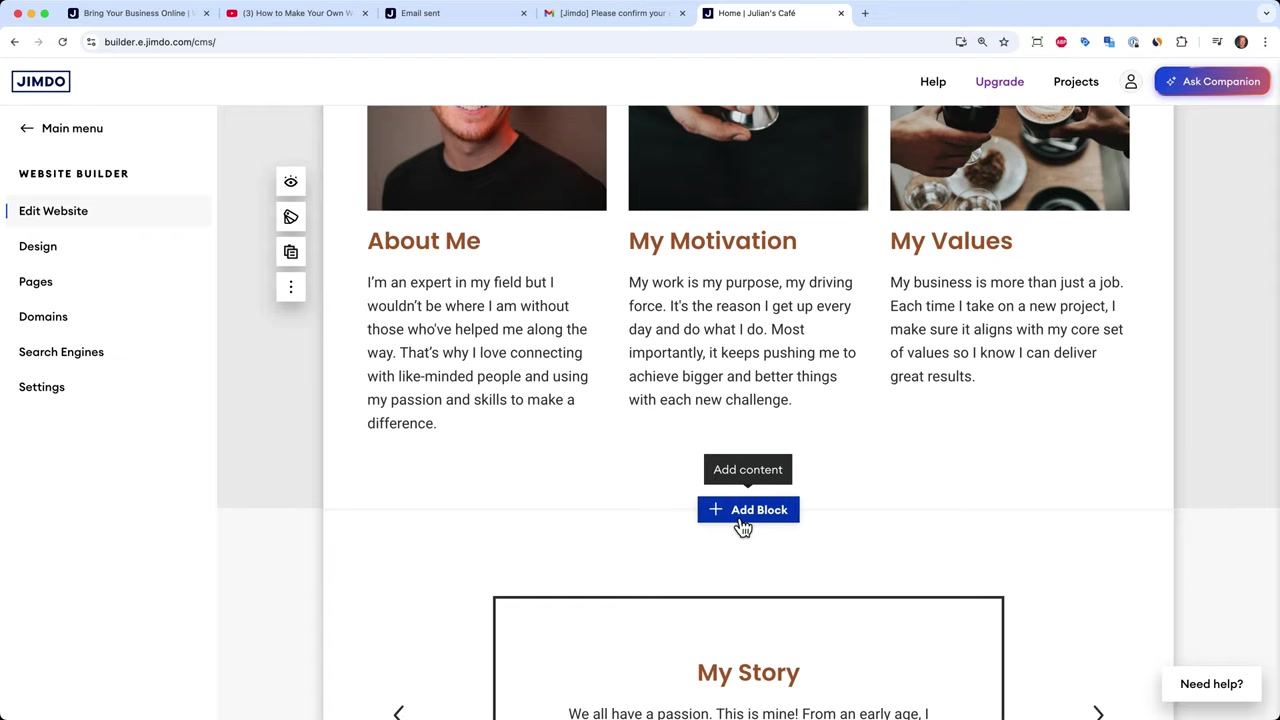
To add content, click Add Block between any two sections. Jimdo suggests relevant blocks using its AI companion based on your site type.
Some useful block types include:
- Cover — full-width hero image with text
- About — introduce yourself or your team
- Gallery — photo grid for your cafe or portfolio
- Menu — a dedicated food/drink menu block
- Text — plain content block for descriptions or articles
Just click the block you want, and Jimdo adds it instantly. Then fill in your own text, images, and prices.
9. Add New Pages to Your Website
Your template starts with a few preset pages (like Home, Contact, and Menu). To add more, go to Pages and click Add Page.
For example, you could add a Team page to introduce your staff. Jimdo automatically adds the new page to your navigation bar — no manual linking required.
Each page works just like the homepage: add blocks, upload images, and edit text. The contact page already comes with a built-in form (name, email, phone, message). You can also add a map block and type in your business address.
10. Change the Navigation Bar
The navigation bar appears on every page of your site. Click on it to edit it directly.
You can replace the site name text with your actual domain name or upload a logo file. Go to Show Elements to toggle the logo visibility.
Under Block Design, you can choose different header layouts — logo on the left, center, or right. You can also add a CTA button to your header (e.g. Reserve a Table) and link it to your contact page.
11. Change the Footer of Your Jimdo Site
The footer appears at the bottom of every page and contains your imprint, privacy policy, and cookie settings by default. Fill in your business information on the imprint page so visitors can always find it.
For the privacy policy, consult a lawyer or use an AI assistant like ChatGPT to draft a starting point — then adapt it to your specific situation.
You can also customize the footer layout and add social media icons. Just click the social icon, paste your YouTube, Instagram, or X profile URL, and visitors can jump straight to your profiles from any page on your site.
12. How to Publish Your Jimdo Website Under Your Own Domain
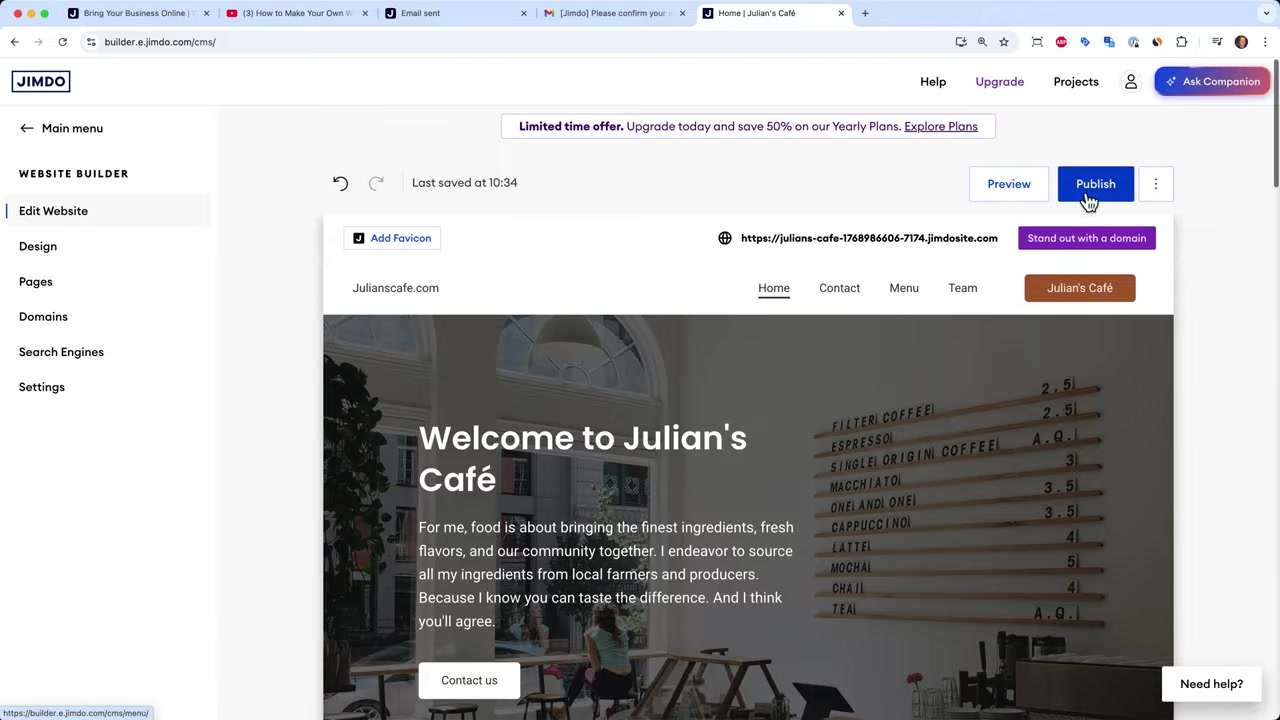
Once your content is ready, click Publish. Jimdo instantly puts your site live under a free subdomain (e.g. julianscafe1768.jimdosite.com).
This is great for testing — open the link in a new tab and check everything works: navigation, contact form, map, buttons. But for a professional image, you'll want your own domain.
Click Get Our Own Domain inside the editor. Jimdo will show you available domains (e.g. juliancafe.com). Select one and choose a plan.
The Startup Plan includes a domain. The Grow Plan adds SEO tools and personal support — useful if you want to grow your business faster. You can pay monthly or yearly. After checkout, Jimdo registers the domain and connects it automatically — usually within one to two hours.
13. How Much Does Jimdo Cost?
Jimdo offers a free plan that lets you build and publish a site under a Jimdo subdomain. It's a good way to test the platform before committing.
Paid plans unlock your own domain, remove Jimdo branding, and add features like SEO tools and customer support. The Startup Plan is the most popular for small businesses and includes a free domain for the first year. The Grow Plan adds advanced SEO and priority support.
Pricing is competitive with other website builders. Check the current rates via the Jimdo partner link to see the latest options.
14. Is Jimdo Good for Beginners?
Yes — Jimdo is one of the most beginner-friendly website builders available. The guided setup wizard, AI block suggestions, and global design system mean you can build a good-looking site without any design or coding experience.
The drag-and-drop editor is straightforward, and every section has clear options for editing text, uploading images, and choosing layouts. Most beginners can have a published site ready within an hour.
15. Jimdo vs Wix – Which Should You Choose?
Both Jimdo and Wix are solid website builders for beginners, but they target slightly different users.
Jimdo shines for simplicity. Its setup wizard is faster, and the global design settings make it easy to maintain a consistent look. It's ideal if you want to get a site up quickly with minimal fuss.
Wix offers more flexibility and a larger app marketplace. It's better if you anticipate needing advanced features like booking systems, membership areas, or a blog with lots of custom options. If you're curious about Wix, check out this Wix tutorial for a comparison.
16. Jimdo Pros and Cons
Pros:
- Very fast to set up — guided wizard does most of the work
- Global design settings save time on styling
- Built-in domain registration — no need for a separate provider
- Clean, mobile-friendly templates
- AI-powered block suggestions
- Free plan available to start
Cons:
- Fewer third-party integrations than Wix or Shopify
- Advanced SEO tools only available on higher plans
- Less design flexibility for power users
- Free plan includes Jimdo branding
Frequently Asked Questions
Can I build a Jimdo website for free?
Do I need coding skills to use Jimdo?
How do I connect my own domain to Jimdo?
Can I change my Jimdo template after setup?
Does Jimdo have a contact form built in?
Can I add a blog to my Jimdo website?
Is Jimdo good for a small business website?
How long does it take to build a Jimdo website?
17. Disclosure
Some links in this post are affiliate links. If you make a purchase through them, I may earn a small commission at no extra cost to you. All content is provided for informational purposes only — no guarantees are made regarding results. This post does not constitute financial, legal, tax, or investment advice.
Related Articles

28 Apr 2026
How to Redesign Your Website with AI (Free & No Code)
Is your website looking dated? In this tutorial from the Julian Weber channel, you'll see how to completely redesign an old website into a clean, modern, and high-converting page — in under 10 minutes...

10 May 2026
Gamma AI Website Builder Tutorial (2026) – Build a Website in Minutes
Most people know Gamma AI for its slick presentations — but did you know it can also build full websites? In this tutorial from the Julian Weber channel, you'll see exactly how to go from a blank prom...

25 Aug 2025
Gamma AI Tutorial 2026 – How to Use Gamma AI for Presentations
Tired of spending hours on PowerPoint slides? Gamma AI lets you create professional, animated presentations in just a few minutes — all you need is a prompt. In this tutorial, you'll see exactly how t...